
Can you weave coasters and mug rugs on a large frame loom kit?
- Emma and Gillian

- Mar 10
- 3 min read
Updated: Apr 8
Using a large frame loom you can create beautiful, handmade coasters that add a personal touch to your coffee table while helping you to learn the basics of weaving. If you are looking to learn to weave then weaving coasters is a perfect place to start.
Whether you are completely new to weaving or simply want a quick project, this guide will walk you through how to make your own woven coasters using our large frame loom weaving kit.

What is Included in the TabbyandTweed large frame loom weaving kit
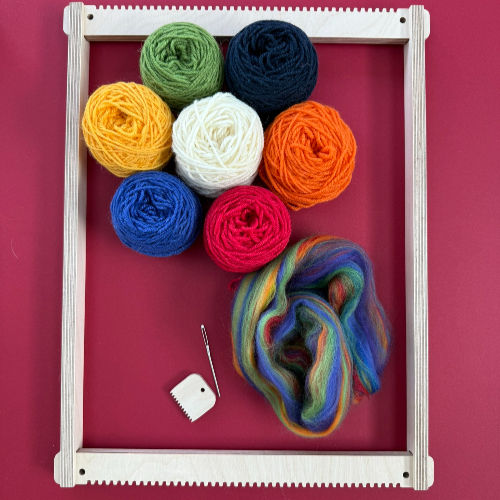
Your kit typically includes everything you need to get started with frame loom weaving:
Large wooden frame loom
Weaving needle
Wooden comb or beater
A selection of British wool yarns and some merino fibres
Step-by-step instructions
Why weaving coasters on a frame loom is great?
Coasters are one of the best beginners weaving projects because they are:
Small and quick to complete
Great for practicing weaving techniques
Perfect for using up leftover yarn
Ideal as handmade gifts
Plus, each coaster becomes a unique mini textile!
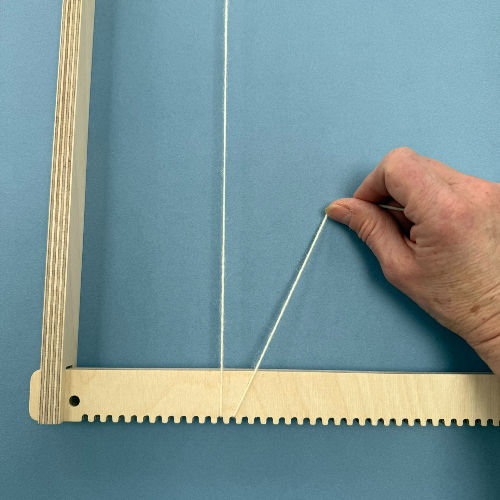
Step 1: Warp your loom
Start by setting up the warp, which are the vertical threads on your loom. The instruction booklet that comes with the loom has greater detail of how to warp the loom but a summary is here.
Tie your warp yarn to the top corner of the loom.
Wrap the yarn around the top and bottom notches of the loom.
Continue back and forth until the loom is evenly warped across a width of approximately 12cm. We routinely use 18 notches but you can use more or less if you would like a narrower or wider coaster.
Make sure the warp threads are tight but not overly stretched.
Tie off securely.
Step 2: Start the tabby weave
The simplest weaving pattern is the tabby weave (also called plain weave).
Thread your weaving needle with yarn.
Go over one warp thread, under the next, repeating across the loom.
On the next row, do the opposite: under one, over one.

Step 3: Use the comb to beat
After each row, use the comb to gently push the yarn down using the comb to keep the weave compact.

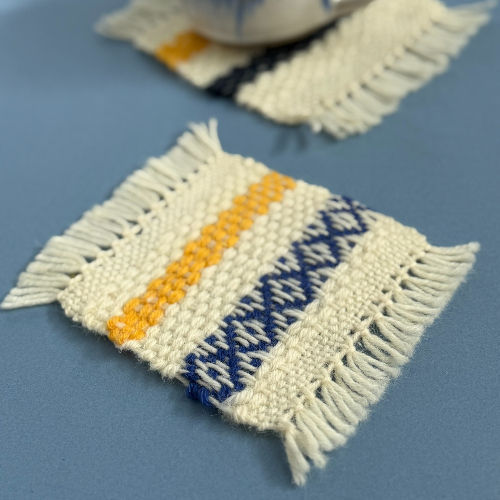
Step 4: Add texture, colour and patterns
One of the most enjoyable parts of weaving is experimenting with colours, textures and patterns. This gives each coaster a unique handmade look. Try:
Colour blocking
Varying the thickness of the yarn - you can double up the yarn to create a thicker weave
Striped patterns
Mixing thick and thin yarns
Adding roving or textured fibres

Step 5: Finish the Coasters using a hemstitch at each end
You can find a hemstitching tutorial for use on a square loom by clicking here: Learn how to hemstitch.

Step 6: Finish the Coasters by removing them from the loom
Carefully remove the warp threads from the loom.
Cut between coaster sections if you made a pair.
Trim the ends neatly.
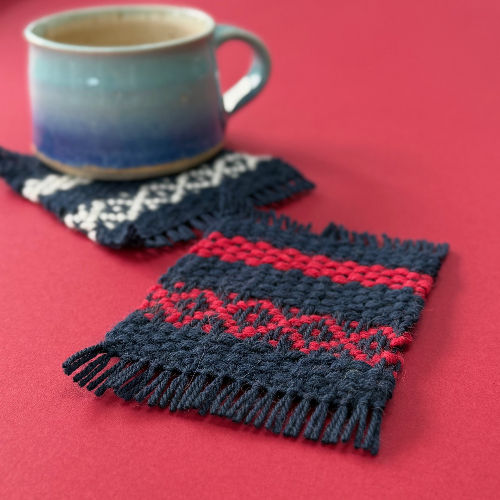
Styling your handmade handwoven coasters
Your finished woven coasters are perfect for:
Coffee tables
Tea trays
Desk décor
Handmade gifts
Pair a set with a mug and some tea for a thoughtful present.
Weaving beautiful coasters couldn't be easier
Weaving coasters is a wonderful introduction to the world of textile crafts. It is calming, creative, and produces something you will actually use every day. Happy weaving!
Details of all our weaving Kits are available in our TabbyandTweed website shop for UK, USA and Canada delivery.
If you are interested in keeping up to date with our weaving work then do sign up to receive our newsletter by clicking the link here.


